Installing a home security camera system doesn’t require professional installation fees or an electrical engineering degree. Anran security cameras have carved out a niche among DIY homeowners looking for affordable, feature-rich surveillance without complex setup requirements. These wireless and wired systems typically arrive as complete kits with cameras, NVR (network video recorder), cables, and mounting hardware. Whether you’re protecting a front porch, monitoring a backyard, or keeping tabs on a detached garage, understanding what you’re working with before drilling the first hole makes the difference between a weekend project and a frustrating week of troubleshooting.
Table of Contents
ToggleKey Takeaways
- Anran security cameras offer affordable DIY home surveillance with complete kits that include cameras, NVR, cables, and mounting hardware without requiring professional installation.
- PoE (Power over Ethernet) systems simplify wiring by delivering both power and data through a single Cat5e or Cat6 cable, eliminating the need for separate power outlets at each camera location.
- Strategic camera placement at 8–10 feet with a 15–20 degree downward tilt ensures optimal facial recognition within 20 feet while avoiding backlighting from windows or direct sunlight.
- Storage capacity directly impacts retention time; a 1TB hard drive stores roughly 10–14 days of continuous 1080p recording from four cameras, making capacity planning essential before installation.
- Changing default passwords immediately and enabling remote access through P2P or port forwarding protects your system from botnets that scan for factory credentials within hours of internet connection.
- Regular quarterly maintenance including lens cleaning, cable inspections, and firmware updates extends system reliability and ensures footage remains available when needed for security purposes.
What Makes Anran Security Cameras a Popular Choice for Home Security
Anran systems appeal to cost-conscious homeowners who want multicamera coverage without monthly cloud subscription fees. Most kits include four to eight cameras with a dedicated NVR that stores footage locally on a pre-installed or user-supplied hard drive, sidestepping recurring storage costs common with cloud-only competitors.
The cameras themselves typically feature 1080p or higher resolution, weatherproof IP66 or IP67 housings, and infrared night vision with ranges between 65 and 100 feet depending on the model. Power-over-Ethernet (PoE) models simplify wiring by delivering both power and data through a single Cat5e or Cat6 cable, eliminating the need to locate AC outlets near each camera position.
Anran’s plug-and-play design suits homeowners comfortable with basic tools but inexperienced with network configuration. The NVR auto-detects cameras on the same network segment, and the included monitor output (HDMI or VGA) lets users review footage without relying solely on mobile apps. For rental properties or temporary installations, the systems can be relocated without leaving behind hardwired infrastructure beyond a few patched screw holes.
Build quality sits squarely in the budget tier. Expect plastic housings, basic mounting brackets, and camera bodies that won’t win design awards but hold up under typical residential use. These aren’t commercial-grade units built for harsh industrial environments, but they’re adequate for covered porches, eaves, and moderately exposed exterior walls.
Key Features and Specifications to Know Before Buying
Before mounting hardware, confirm your kit’s specifications match your needs. Resolution matters more than megapixel marketing claims, 1080p (1920×1080) provides clear facial recognition within 20 feet under good lighting, while 2K or 4MP models add detail for larger coverage areas or distant subjects. Some systems now include 2K resolution cameras that improve clarity without requiring a complete network overhaul.
Night vision performance depends on IR LED count and lens quality. Budget cameras often sacrifice low-light sensitivity for higher daytime resolution. Check sample footage if possible, grainy, washed-out nighttime video won’t help identify a porch pirate.
Power delivery comes in three flavors:
- PoE (Power over Ethernet): Single Cat5e/Cat6 cable per camera. Requires PoE-capable NVR or separate PoE switch. Cleanest install for new construction or unfinished spaces where you can run cable through walls.
- 12V DC with separate power adapter: Each camera needs nearby AC outlet or centralized power distribution box. More flexible for retrofits but clutters installation with extra cables.
- Wireless (battery or solar): Rare in Anran’s lineup but eliminates wiring entirely. Battery life and Wi-Fi range become limiting factors.
Storage capacity directly impacts retention time. A 1TB hard drive stores roughly 10–14 days of continuous recording from four 1080p cameras at standard compression (H.264). Upgrading to 2TB or 4TB extends retention to a month or more, useful if you travel frequently. Motion-triggered recording stretches storage but may miss events during detection gaps.
Mobile app functionality varies by model year and firmware version. Older Anran systems use proprietary apps with clunky interfaces, while newer models support more polished third-party apps or ONVIF compatibility for integration with home automation platforms. Test remote viewing over cellular data before finalizing installation, some routers require port forwarding or UPnP configuration that novices find intimidating.
Step-by-Step Installation Guide for Anran Security Cameras
Proper planning prevents three common mistakes: cameras pointed at useless angles, cable runs that dead-end at inaccessible spots, and mounts drilled into materials that won’t hold weight.
Choosing the Right Mounting Locations
Start with a site survey holding each camera at candidate positions while a second person reviews the live view on a laptop or monitor connected to the NVR. Mark coverage blind spots and adjust until you’ve eliminated gaps around entry points.
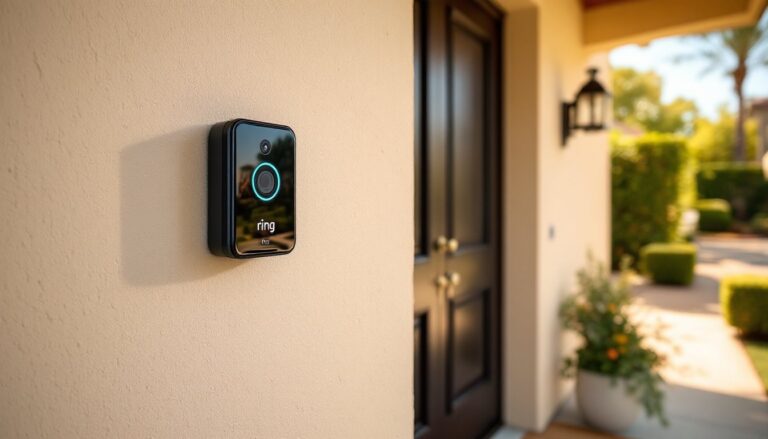
Height and angle matter. Mount cameras 8–10 feet above ground to capture faces while staying out of easy reach. Tilt slightly downward, a 15–20 degree angle balances facial detail with coverage area. Cameras mounted flat against walls often capture more scalp than face.
Avoid backlighting. Cameras pointed toward windows, glass doors, or setting sun produce silhouetted footage. Position units under eaves or soffits to shield lenses from direct weather and glare.
Check wall composition before drilling. Vinyl siding over wood sheathing holds screws well: fiber cement, brick, and stucco require masonry bits and anchors. Hollow sections need toggle bolts or backing plates to prevent cameras from sagging over time.
Plan cable pathways now. Measure runs from each camera to the NVR location, adding 10–15% slack for routing around obstacles and future adjustments. For exterior-to-interior runs, identify penetration points near attic access, basement rim joists, or utility entry locations already sealed with conduit.
Wiring and Power Setup Tips
Run cables before mounting cameras permanently. For PoE systems, use outdoor-rated Cat5e or Cat6 with solid copper conductors (not copper-clad aluminum, which increases resistance and fails prematurely). Terminate runs at the NVR end first to verify connectivity before fishing cable through walls.
Drill penetration holes with slight downward slope toward exterior to prevent water intrusion. A ⅝-inch or ¾-inch spade bit accommodates RJ45 connectors with room for sealant. Snap-in weatherproof cable glands or silicone caulk around pass-throughs stop moisture and insects.
Safety note: Wear safety glasses when drilling overhead into soffits or eaves. Fiberglass insulation and debris fall directly into your face.
For multi-story installations or long cable runs (over 100 feet), test each connection with the NVR before mounting cameras. PoE power delivery weakens beyond 328 feet (100 meters), if you’re pushing that limit, consider a PoE switch midpoint or stepping up to shielded cable.
Secure cables every 12–18 inches along exterior runs using cable clips or conduit. Loose cables flap in wind, wear through protective jackets, and look sloppy. In attics and crawl spaces, avoid stapling cables to the top of joists where future workers might step on or snag them.
Label both ends of every cable with camera position (“Front Porch,” “Garage Side,” etc.). You’ll thank yourself six months later during troubleshooting or system expansion.
Configuring Your Anran Camera System and Mobile App
Physical installation is half the job. Network configuration and mobile access separate a functioning camera from a useful one.
Connect the NVR to your router via Ethernet before powering up. Most units auto-assign IP addresses via DHCP, but access the NVR’s web interface or monitor output to confirm all cameras appear in the device list. Initial detection takes 30–60 seconds per camera as the system negotiates network handshakes.
Set the system clock accurately. Incorrect timestamps render footage useless for insurance claims or police reports. Enable NTP (Network Time Protocol) sync if your NVR supports it, or manually adjust for time zone and daylight saving.
Customize recording settings per camera. Continuous recording maximizes evidence but fills drives quickly. Motion detection with adjustable sensitivity zones reduces storage use, mask out tree branches or busy streets that trigger false alerts. Set detection zones to cover doorways, driveways, and pathways where actual activity occurs.
When comparing home security system options, remote access remains a priority for most homeowners. Download the manufacturer’s mobile app (check model documentation for the correct app name, Anran has used multiple apps across product generations). Scan the NVR’s QR code or manually enter its serial number and verification code, typically found on a label near the Ethernet ports.
Remote viewing requires port forwarding or P2P (peer-to-peer) cloud relay. P2P is easier but introduces latency and depends on third-party servers. Port forwarding delivers better performance but requires logging into your router’s admin panel and mapping external ports to the NVR’s internal IP. If this sounds like gibberish, stick with P2P unless you’re comfortable following router-specific guides.
Change default passwords immediately. Factory credentials like “admin/admin” or “888888” are published online and scanned by botnets within hours of connecting to the internet. Use a unique password with mixed case, numbers, and symbols. Store it in a password manager, you’ll need it again.
Test mobile alerts and push notifications from every camera. Walk through detection zones while monitoring your phone. Adjust motion sensitivity and alert schedules (disable notifications during known activity periods to avoid alert fatigue).
For homeowners exploring broader connected device integration, note that budget NVRs rarely support IFTTT, HomeKit, or advanced automation platforms without third-party bridges or ONVIF hacks.
Troubleshooting Common Issues and Maintenance Tips
No video feed from one or more cameras: Verify cable seating at both ends, RJ45 connectors click audibly when fully inserted. Swap a known-good cable to isolate whether the issue is the camera, cable, or NVR port. Check PoE port LEDs on the NVR: steady green indicates connectivity, flashing amber suggests negotiation problems.
Choppy or pixelated remote viewing: Reduce video quality settings in the mobile app or upgrade your home internet upload speed. Most ISPs provide asymmetric connections, 100 Mbps download doesn’t guarantee sufficient upload bandwidth for multiple HD streams. Lowering frame rate from 30fps to 15fps cuts bandwidth use in half with minimal quality loss for security purposes.
Frequent false motion alerts: Narrow detection zones to exclude moving foliage, headlights, or insects crawling on the lens. Lower sensitivity or increase the pixel threshold required to trigger recording. Spiderwebs love camera housings, brush them away monthly or apply a light coating of silicone spray to slick surfaces where spiders anchor threads.
Cameras offline after power outage: Most NVRs auto-reconnect, but older firmware may require manual reboot. Add the NVR to a small UPS (uninterruptible power supply) to ride through brief outages and allow graceful shutdown during extended cuts, preventing hard drive corruption.
Night vision looks washed out or has IR glare: Reflective surfaces within 5–10 feet bounce infrared light back into the lens. Reposition cameras away from windows, glossy siding, or metal trim. Disable IR LEDs on cameras with sufficient ambient light (porch lights, street lamps) and rely on color night vision if the model supports it.
Maintenance checklist (quarterly):
- Wipe camera lenses with microfiber cloth, pollen, dust, and salt spray degrade image quality.
- Inspect cable connections and weatherproofing sealant for cracks or gaps.
- Review a week of stored footage to verify recording schedules and storage capacity.
- Update NVR firmware if manufacturer releases patches (but read changelogs first, some updates break third-party app compatibility).
- Test backup and export functions to ensure you can pull footage when needed.
For persistent issues beyond basic troubleshooting, check Anran’s support forums or contact their technical support with specific model numbers and error messages. Budget brands sometimes discontinue models quickly, leaving older systems unsupported within 2–3 years. Plan accordingly if you’re buying a system nearing end-of-life.