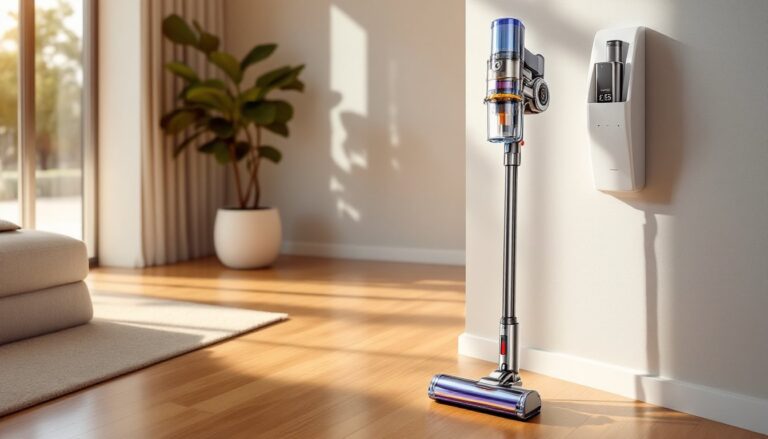
A Dyson vacuum is a workhorse appliance, but even the best machine can lose suction when its hose develops issues. The hose is a critical airflow pathway, when it clogs, cracks, or tears, cleaning performance tanks fast. Most homeowners don’t think about their vacuum hose until something goes wrong, but a little routine maintenance and knowing when to replace it can extend the life of the entire unit. This guide covers the essentials: identifying common hose problems, cleaning techniques that actually work, and how to choose and install the right replacement hose for your specific Dyson model.
Table of Contents
ToggleKey Takeaways
- A Dyson vacuum hose is a critical airflow pathway, and when it clogs, cracks, or tears, cleaning performance drops significantly—regular maintenance and knowing when to replace it can extend the life of your entire unit.
- Common Dyson vacuum hose problems like clogs, cracks, and suction loss can often be identified quickly: hold the hose to light to check for blockages, run your hand along it while powered to detect air leaks, and inspect collar fittings for wear.
- Clean your Dyson hose every 3–6 months by flushing with lukewarm water and mild detergent, then hanging it vertically to dry completely for 24–48 hours to prevent mold and electrical damage.
- Dyson hoses are model-specific, so verify your exact model number before purchasing a replacement—OEM parts cost $30–$60 and guarantee fitment, while aftermarket options range from $15–$35 with variable quality.
- Replacing a Dyson vacuum hose is a straightforward 10–15 minute DIY task: power off, remove the old hose, clean connection ports, install the new hose with a firm twist or press, and test suction before reassembling.
Understanding Your Dyson Vacuum Hose
Dyson vacuum hoses vary by model but share core design principles. Most consist of a flexible corrugated tube made from durable thermoplastic or rubberized polymer, reinforced with an internal wire coil to prevent collapse during suction. The corrugations allow the hose to bend without kinking, while the wire maintains structural integrity under negative pressure.
Upright models like the Dyson Ball series typically feature shorter hoses (3–5 feet) attached to a wand and tool assembly. Canister and cordless stick models often use longer, more flexible hoses that connect the cleaning head to the main motor unit. Some models, like the V-series cordless vacuums, don’t have a traditional hose at all, they use rigid wands with smaller flexible connectors.
Key components include the collar fittings at each end, one connects to the main body or motor housing, the other to the wand or accessory tools. These collars use twist-lock, snap-fit, or friction-fit mechanisms depending on model year and series. Over time, these connection points wear out, causing air leaks that reduce suction.
Most Dyson hoses are not universal. A hose designed for a DC series upright won’t fit a V11 cordless. Model-specific engineering means diameter, length, and connector type all vary. Always verify your exact model number (found on the serial plate near the dustbin or motor housing) before ordering parts.
Common Dyson Vacuum Hose Problems and Quick Fixes
Clogs and Blockages
Clogs are the most frequent hose issue and the easiest to diagnose. If suction drops suddenly or the vacuum emits a high-pitched whine, a blockage is likely. Common culprits include pet hair matted into dense wads, small socks, toy parts, and clumped dust.
To check for clogs, detach the hose from both ends. Hold it up to a light source, if you can’t see through, there’s a blockage. For partial clogs, feel along the length of the hose for firm lumps.
Quick fix: Use a broomstick or straightened wire coat hanger to push obstructions through. Work from both ends if needed. For stubborn hair clogs, a long-handled bottle brush works well. After clearing, run water through (see cleaning section below) to confirm full airflow.
If clogs recur frequently, the issue may be upstream, check the floor head, wand, and pre-motor filter. A saturated filter forces debris to back up into the hose.
Cracks, Tears, and Loss of Suction
Physical damage to the hose wall compromises suction instantly. Cracks often develop at stress points: where the hose bends repeatedly during use, or near the collar fittings where plastic fatigues over time. Tears can happen when the hose snags on furniture edges or gets pinched in doors.
To inspect, run your hand slowly along the entire hose length while it’s powered on. You’ll feel air escaping from any breach. Small cracks (under 1/4 inch) can be temporarily patched with electrical tape or duct tape wrapped tightly in overlapping layers, but this is a stopgap, tape degrades and adhesive residue attracts dust.
Loss of suction without visible damage often points to connection issues. Check that both collar fittings are fully seated and locked. Wiggle them, if there’s play, the gasket or locking tabs may be worn. Some users report household cleaning problems stem from accumulated grime around seals rather than hose failure.
For any crack longer than 1/2 inch or multiple tears, replacement is the only reliable fix. Patched hoses rarely restore full performance.
How to Clean Your Dyson Vacuum Hose Properly
Regular hose cleaning prevents clogs and maintains airflow. Dyson recommends cleaning the hose every 3–6 months depending on usage, or immediately after vacuuming fine debris like drywall dust or pet litter.
Step-by-step cleaning process:
- Disconnect the hose from both the vacuum body and wand. Consult your model’s manual for the release mechanism, most use a button or twist-lock collar.
- Flush with lukewarm water. Hold one end under a faucet or outdoor hose and run water through for 1–2 minutes. Rotate and flex the hose to dislodge stuck debris.
- Use mild detergent for stubborn residue. Mix a few drops of dish soap in a bucket, dip a bottle brush or flexible cleaning snake, and scrub the interior. Avoid harsh chemicals, they can degrade plastic and rubber.
- Rinse thoroughly until water runs clear. Any soap left inside will attract dust and cause foaming during use.
- Drain and dry completely. Hang the hose vertically in a warm, dry space (garage, laundry room) for 24–48 hours. Ensure no water remains, moisture inside the hose can promote mold growth and damage electrical connections when reattached.
Safety note: Never reconnect a damp hose to the vacuum. Water in the motor or electrical components can cause short circuits or permanent damage not covered by warranty.
For odor issues, a solution of 1 part white vinegar to 3 parts water can neutralize smells without harsh chemicals. Rinse well afterward.
Don’t use compressed air alone to clean hoses, it may push debris deeper into the main unit or motor housing.
When and How to Replace Your Dyson Vacuum Hose
Choosing the Right Replacement Hose for Your Model
Not all Dyson vacuum hose replacement parts are created equal. Using an incorrect hose can cause poor fitment, air leaks, or even damage to the vacuum’s internal components.
Identify your exact model: The model number is printed on a label near the dustbin release or on the motor housing. Common formats include DC25, DC65, V8, V11, Ball Animal 2, etc. This number determines hose compatibility.
OEM vs. aftermarket options: Dyson-branded (OEM) hoses cost more, typically $30–$60 depending on model, but guarantee fitment and material quality. Aftermarket hoses run $15–$35 and can work well, but quality varies. Check reviews for complaints about loose fittings or thin-walled construction. Many homeowner maintenance guides recommend OEM parts for critical airflow components.
Verify dimensions: Measure the old hose length and diameter at the collar if possible. Aftermarket listings sometimes use generic photos. Key specs to match: internal diameter (usually 1.5–2 inches), overall length, and collar type (twist-lock vs. push-fit).
Where to buy: Dyson’s official site, authorized retailers like Home Depot or Best Buy, and Amazon all carry replacement hoses. For older or discontinued models, eBay and specialty vacuum parts suppliers may have stock. Avoid unbranded “universal” hoses unless you can confirm compatibility.
Installation steps:
- Power off and unplug the vacuum. For cordless models, remove the battery.
- Remove the old hose by pressing the release button or twisting the collar counterclockwise. Some models require a screwdriver to remove a retaining clip.
- Inspect the connection ports on the vacuum body and wand. Clean any dust or debris that could prevent a tight seal.
- Align the new hose collar with the port. Push firmly and twist or press until you hear/feel a click. Tug gently to confirm it’s locked.
- Test suction before reassembling tools. Run the vacuum for 30 seconds and check for air leaks at both connections.
If the new hose doesn’t fit snugly or feels loose, double-check the model number. A wrong hose may physically attach but won’t maintain proper suction.
When to call a pro: If your vacuum is still under warranty, contact Dyson support before attempting replacement, DIY repairs can void coverage. For vacuums with integrated electronics in the hose (some cordless models), professional service ensures you don’t damage sensors or wiring. Professionals may reference workshop repair techniques for complex disassembly.
Replacement is almost always a straightforward DIY task for standard hose assemblies. The total job takes 10–15 minutes with no special tools required beyond what’s needed to remove the old hose. Expect the new hose to restore full suction if that was the only issue, if performance is still poor after replacement, the problem likely lies with the motor, filter, or floor head.